Power Up Your Pipeline: Playwright Tests with Github

So, let’s talk about a common scenario: QA teams diving into automation testing with all the enthusiasm in the world, only to find themselves drowning in a sea of forgotten scripts and missed updates. Sound familiar?
Well, here’s the scoop: there’s a simple yet powerful solution that could save the day – Git. Yeah, that version control thingy developers swear by? Turns out, it’s a total game-changer for QA too.
Heard about something called cron jobs? In simple terms, it’s just a way to repeat the same process at scheduled time intervals, such as daily at 2 pm or every 2 hours, etc.
Imagine this: no more sweating over test maintenance or struggling to keep up with changes. With Git in your toolkit and a well-oiled automation pipeline, you’re set for smoother sailing through the testing waters.
Let’s dive into setting up GitHub Actions to seamlessly integrate with Playwright, setting up cron jobs, and ultimately solving the challenge of maintaining scripts
1. Getting started with Playwright
We can do a basic Playwright setup; we will use the following technologies:
- Typescript - dealing with types is much easier
- yarn as our package manager
- Github with Github Actions
- Playwright itself
Make sure you have yarn installed.
npm install -g yarn
Create a repo on Github, clone it and initialize a project.json file
git clone <project repo>
cd <project repo>
yarn init . # then follow the prompts
Setup playwright by following the prompts.
yarn create playwright

Initializing project in '.'
✔ Do you want to use TypeScript or JavaScript? · TypeScript
✔ Where to put your end-to-end tests? · tests
✔ Add a GitHub Actions workflow? (y/N) · false
✔ Install Playwright browsers (can be done manually via 'yarn playwright install')? (Y/n) · true
✔ Install Playwright operating system dependencies (requires sudo / root - can be done manually via 'sudo yarn playwright install-deps')? (y/N) · true
If some installations fail, like the Playwright Browsers, you might need to run the yarn command using sudo.
sudo yarn create playwright
At this stage, I am assuming everything went well. Your folder structure should look like this:
root-dir/
	- node_modules/
	- tests/
	- test-examples/
.gitignore
playwright.config.ts
yarn.lock
2. Setup basic tests
Inside the tests folder, we can setup basic tests to get things flowing. Create a file: truthy.spec.ts
import { test, expect } from "@playwright/test";

test("should be true", async () => {
  expect(true).toBeTruthy();
});

test("should fail", async () => {
  expect(false).toBeTruthy();
});
We can now run the tests and check if they pass, or fail.
yarn playwright test truthy.spec.ts --project chromium
3. Github Actions Integration
Pipelines are just computers (containers) running somewhere, so our job is to just write a set of instructions on how to clone, install packages, and run our code.
Github already configured the base of where we’re going to run our code, so we don’t need to install an OS from scratch.
In pseudo code, lets just outline what we need to do:
# Pipeline Setup in Pseudo
1. choose an image where our code is going to run
2. clone and checkout to a branch
3. install dependencies our codes needs to run
4. install browsers that playwright needs
5. run our scripts
Easy enough right? Let’s create a folder called: .github/workflows in our project root directory, and create a file called playwright.yml:
root-dir/
	- node_modules/
	- .github/
		- workflows/
			playwright.yml
	- tests/
	- test-examples/
.gitignore
playwright.config.ts
yarn.lock
Now that we have that part covered. Let’s go over setting up the steps in the yaml file. The first thing is setting up our base OS, in our case, we’re using Ubuntu 22, the LTS version.
name: Playwright tests with Github Actions
on:
push:
branches: [main]
pull_requests:
branches: [main]
jobs:
Basic-tests:
timeout-minutes: 10
runs-on: ubuntu-latest
steps:
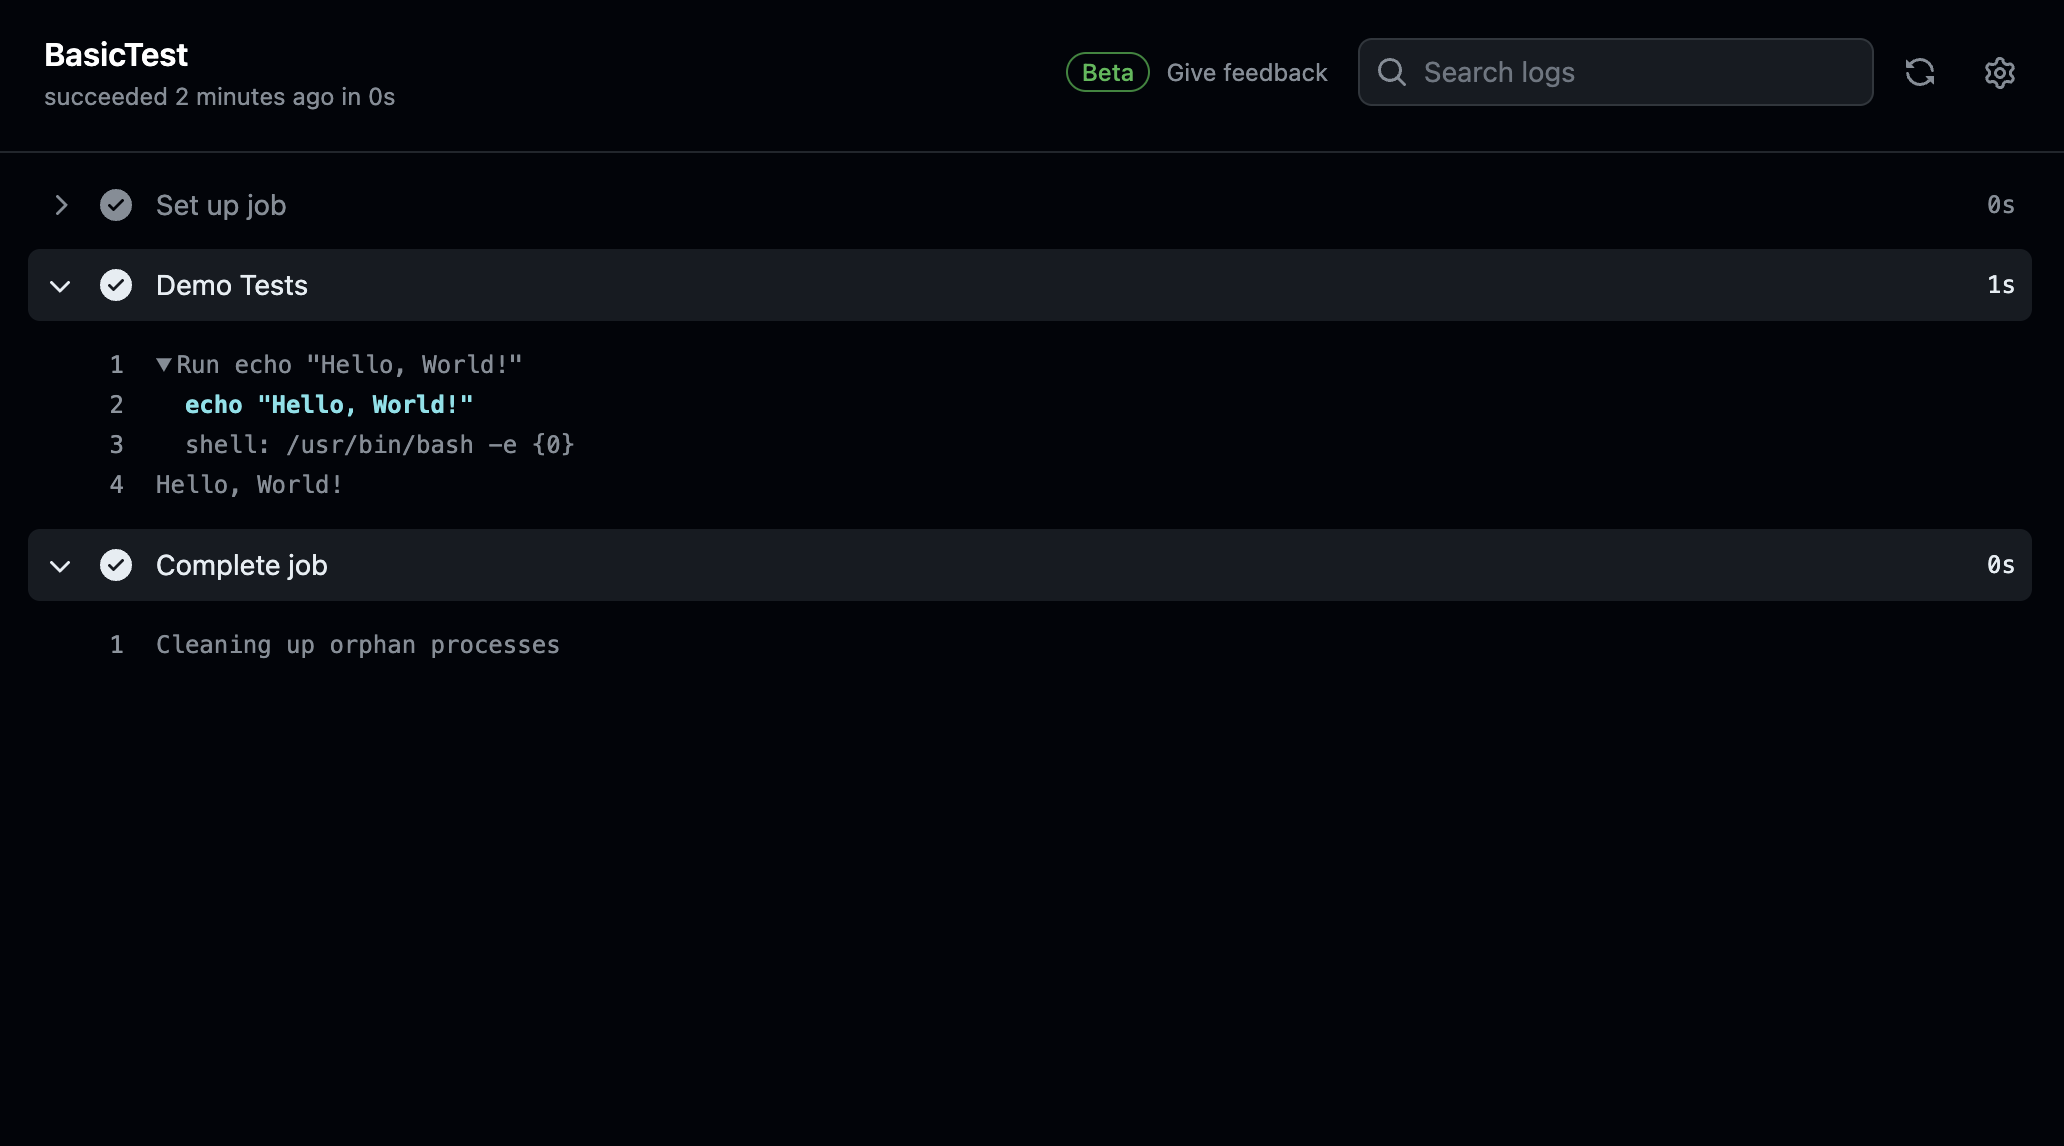
- name: Demo Tests
run: echo 'Hello World'
Commit your changes, push to git, and view the pipeline run.
4. Now, Complete the Pipeline
We currently have a working pipeline, now, lets add the remaining steps from our pseudo:
2. clone and checkout to a branch
3. install dependencies our codes needs to run
4. install browsers that playwright needs
5. run our scripts
Let’s clone our source code into the container, add node into the image, and install required depedencies.
name: Playwright tests with Github Actions

on:
  push:
    branches: [main] # Use spaces around branch names
  pull_requests:
    branches: [main] # Use spaces around branch names

jobs:
  Basic-tests:
    timeout-minutes: 10
    runs-on: ubuntu-latest
    steps:
      - uses: actions/checkout@v3 # clone code and checkout to branch
      - uses: actions/setup-node@v3 # setting up nodejs
        with:
          node-version: 18
      - name: Install Dependencies
        run: yarn # Combine all yarn commands into a single line

      - name: Run Tests
        run: yarn playwright test truthy.spec.ts
Let’s go over what we have done above.
- We have setup a step where we clone the repo, and checkout to the branch where we want to run our tests
- We have setup nodejs
- it comes with pre configured npm packages like
yarn. So, we don’t have to install it from scratch
- it comes with pre configured npm packages like
- We have installed our packages using yarn
- And finished the entire process by installing Playwright Browsers
- Then run the tests using the
yarn playwright test truthy.spec.ts
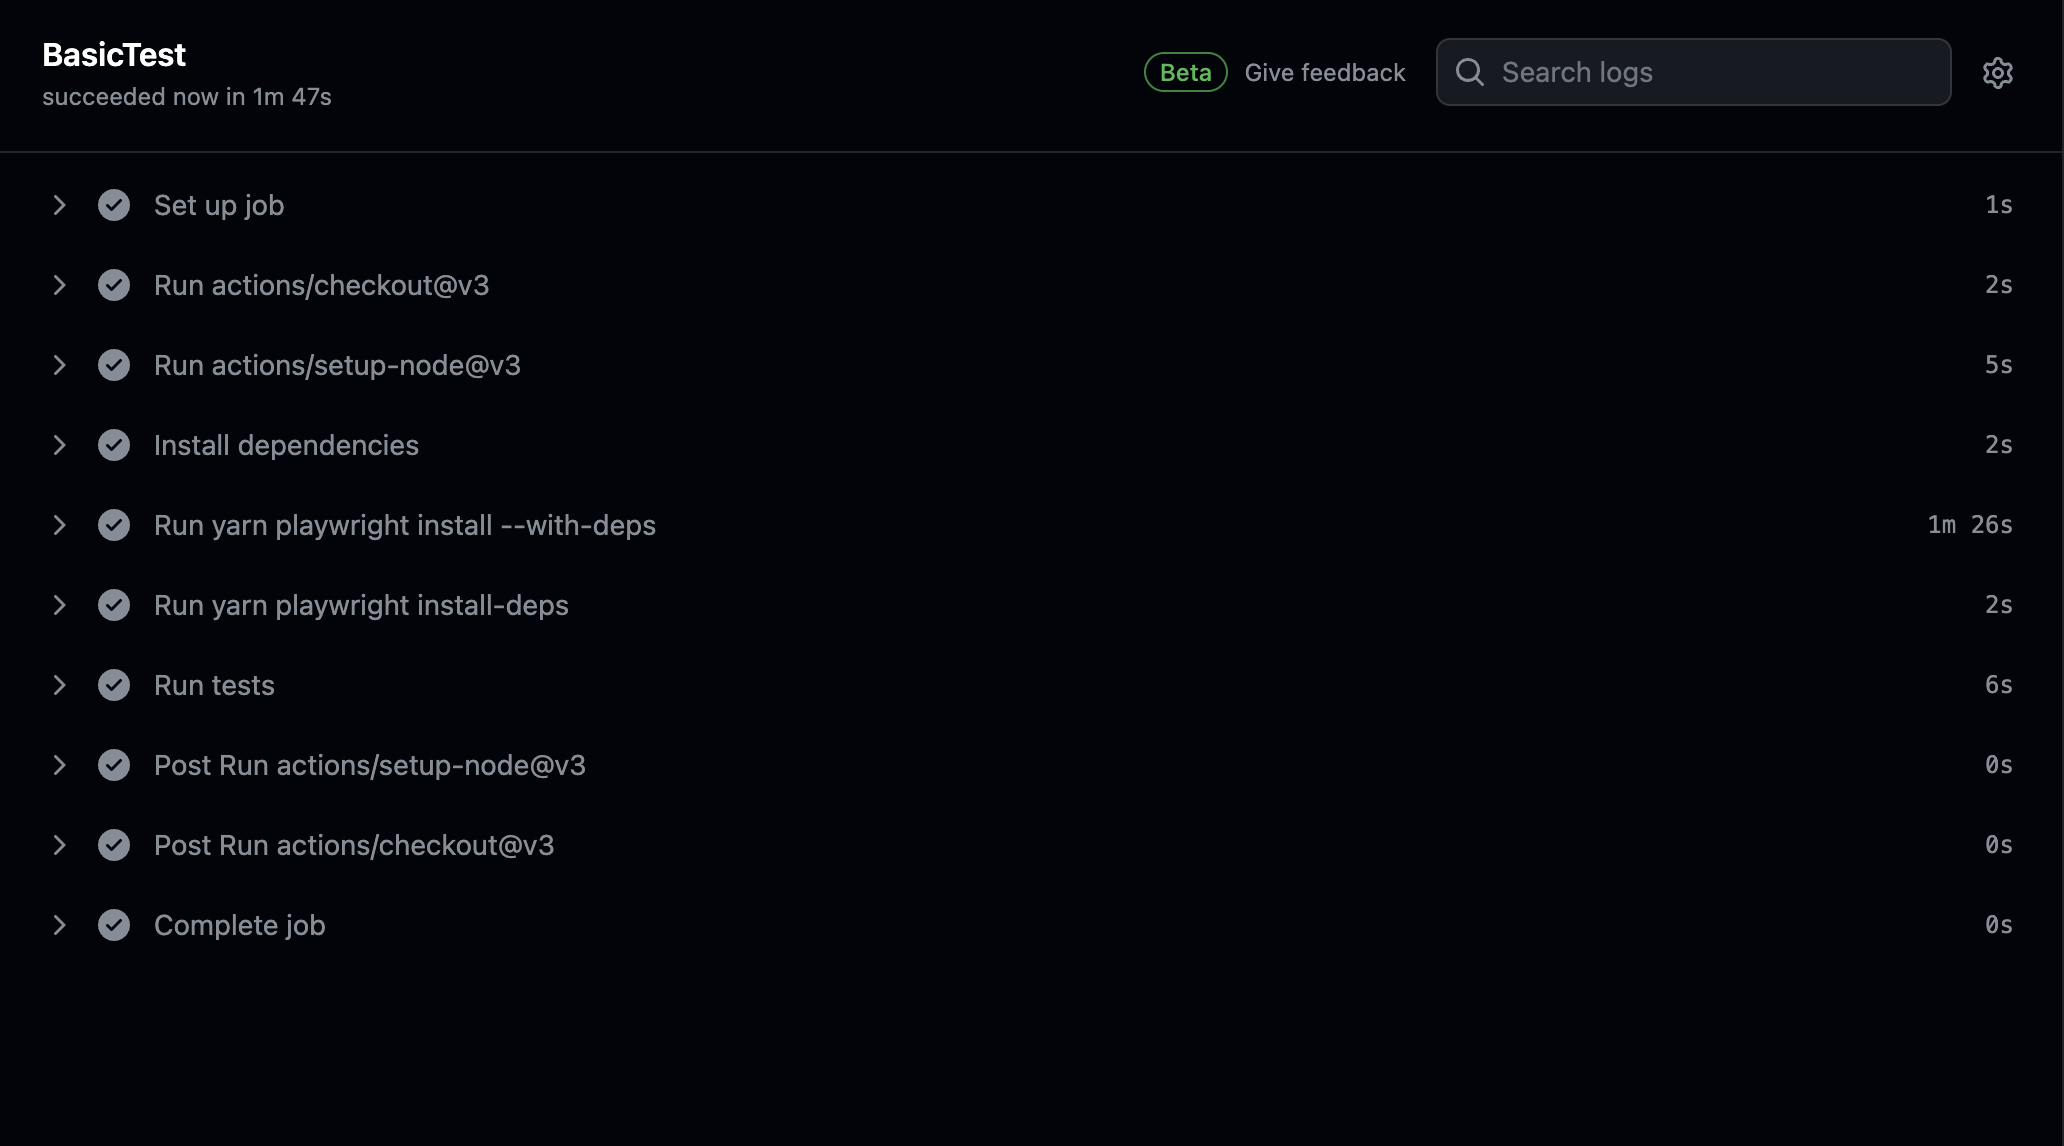
We have a successful run. A pipeline is setup to run your tests on push to any branch, and pull requests to the main branch, but we have a problem. We’re always installing depedencies, we need to optimize this and just install packages if there’s changes to the yarn.lock file, or any version changes by introducing caching in github
5. Optimising our Pipeline
Now, we need to cache the following:
- Our node_modules
- yarn caches
- Playwright Browsers
name: Playwright tests with Github Actions

on:
  push:
    branches: [main]
  pull_requests:
    branches: [main]

jobs:
  Basic-tests:
    timeout-minutes: 10
    runs-on: ubuntu-latest
    steps:
      - uses: actions/checkout@v3 # clone code and checkout to branch
      - uses: actions/setup-node@v3 # setting up nodejs
        with:
          node-version: 18
          cache: "yarn" # Add cache option under 'with'
      - name: Install Dependencies
        run: yarn playwright install --with-deps && yarn playwright install-deps # Combine commands with &&

      - name: Run Tests
        run: yarn playwright test truthy.spec.ts
Now, we have cached yarn, and node modules. Github makes it super easy.
The next part is a bit dirty; which is Playwright Browsers. Here’s how we’re going to achive that using pseudo code:
- get playwright latest version
	- store it in a variable (we'll use this to check if
	its necessary for us to restore cache or download
	new one if playwright is updated)
- check cache before installing any playwright browsers
	- restore if its there, download otherwise
That’s it. Now, lets look at bash snippets on how we’ll obtain the Playwright version from yarn files:
echo "PLAYWRIGHT_VERSION=$(yarn list --pattern @playwright/test --depth=0 | grep '@playwright/test' | grep -o '[0-9]\+\.[0-9]\+\.[0-9]\+')"
And to store it into Github environmental variables, we need to pipe the results; >> $GITHUB_ENV
echo "PLAYWRIGHT_VERSION=$(yarn list --pattern @playwright/test --depth=0 | grep '@playwright/test' | grep -o '[0-9]\+\.[0-9]\+\.[0-9]\+')" >> $GITHUB_ENV
Important: The script only works for yarn packages.
To complete the pipeline now, we need to add the following:
- step to get Playwright version
- step to cache binaries
- conditionals to check if the cache is available
name: Playwright tests with Github Actions

on:
  push:
    branches: [main]
  pull_requests:
    branches: [main]

jobs:
  Basic-tests:
    timeout-minutes: 10
    runs-on: ubuntu-latest
    steps:
      - uses: actions/checkout@v3 # clone code and checkout to branch
      - uses: actions/setup-node@v3 # setting up nodejs
        with:
          node-version: 18
          cache: "yarn" # Cache node modules

      - name: Get Playwright version
        id: playwright-version
        run: echo "PLAYWRIGHT_VERSION=$(yarn list --pattern @playwright/test --depth=0 | grep '@playwright/test' | grep -o '[0-9]\+\.[0-9]\+\.[0-9]\+')" >> $GITHUB_ENV

      - name: Cache Playwright binaries
        uses: actions/cache@v3
        with:
          path: | # Define paths to cache (Playwright cache directories)
            ~/.cache/ms-playwright
            ~/.cache/ms-playwright-*
          key: $-playwright-$ # Cache key based on OS, Playwright version

      - name: Install Dependencies
        run: yarn

      - name: Install Playwright (only if cache miss)
        run: yarn playwright install --with-deps
        if: steps.playwright-cache.outputs.cache-hit != 'true' # Conditional based on cache hit

      - name: Install additional Playwright dependencies (only if cache miss)
        run: yarn playwright install-deps
        if: steps.playwright-cache.outputs.cache-hit != 'true' # Conditional based on cache hit

      - name: Run Tests
        run: yarn playwright test truthy.spec.ts
Commit, and push your code. Let the pipeline run for the first time:
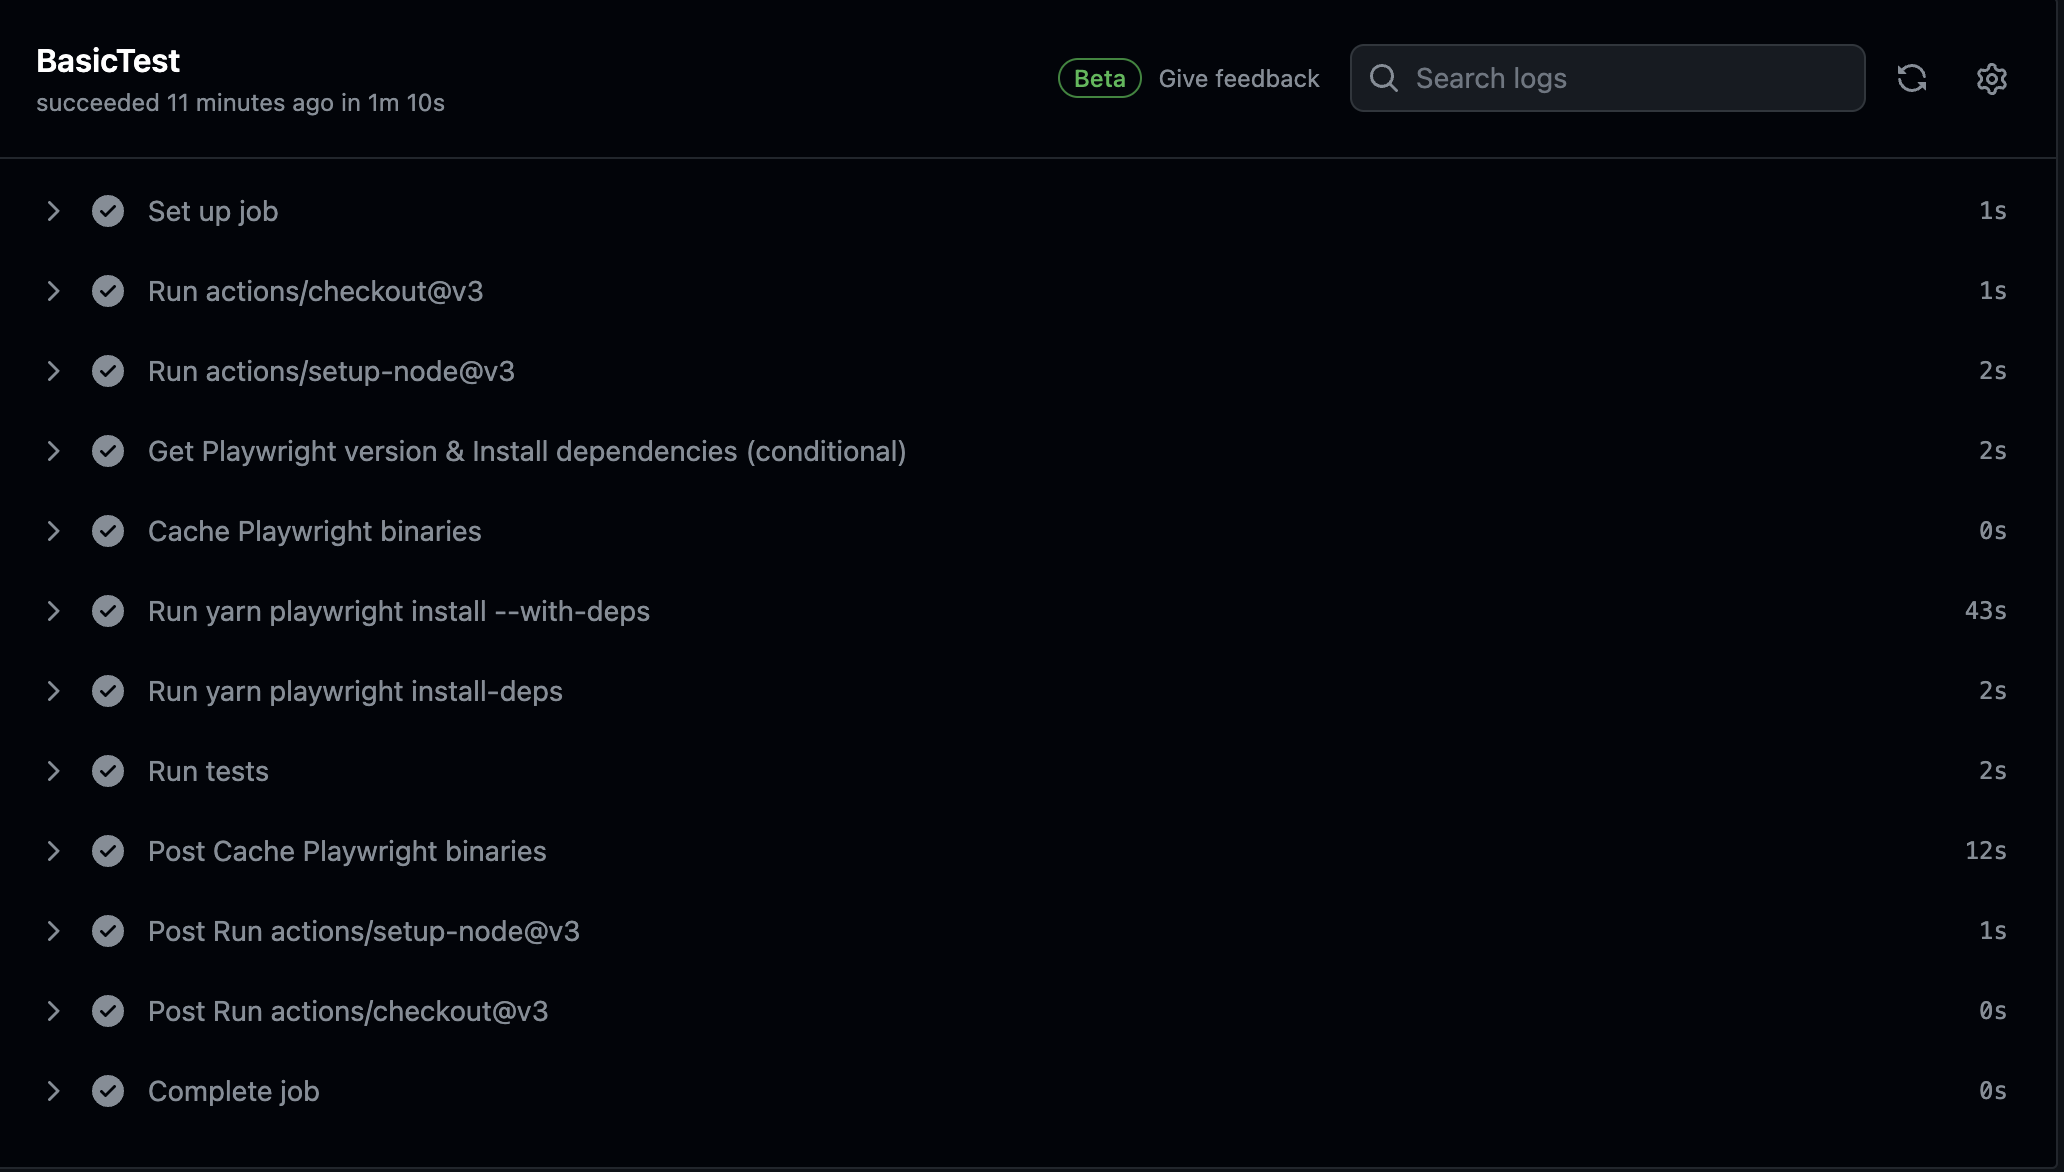
Then re-run the pipeline to validate if the solution of caching dependencies actually worked:
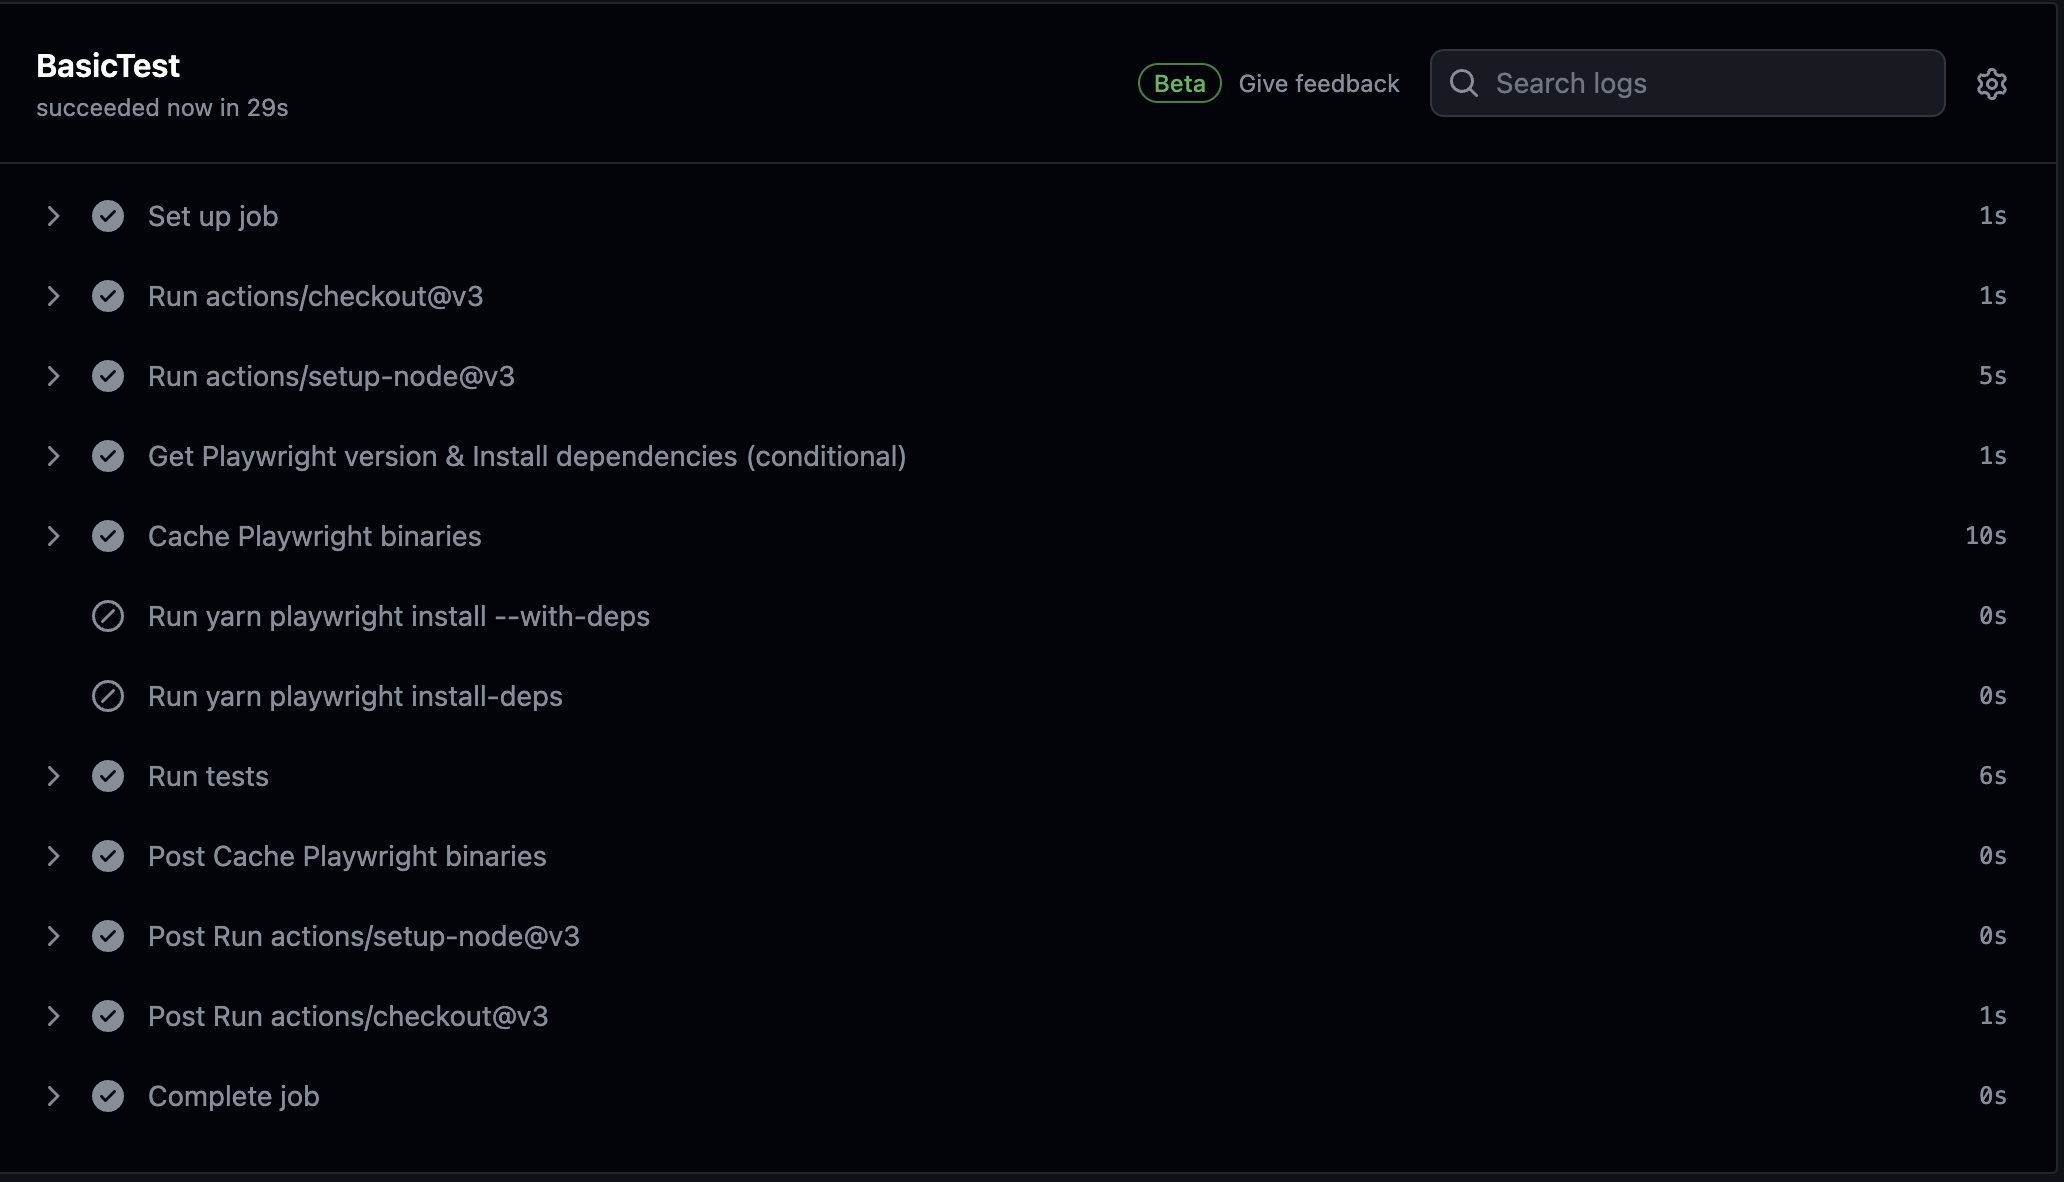
The cache was a success, and now look at the execution time. All of them are now under 10 seconds; which is a huge improvement.
Summary
And there you have it! With Git as your trusty sidekick and GitHub Actions shaking hands with Playwright, you’re all set to conquer the testing world. From basic setups to optimizing pipelines, we’ve covered it all.
So, what’s next? It’s time to roll up your sleeves, dive into automation, and watch those tests run smoother than ever before.
Happy Automation my people. :D